· Editor · Tutorials · 6 min read
How to post multiple photos on Instagram
Learn how to post multiple photos on Instagram with this step-by-step guide. Boost engagement, tell better stories, and connect with your audience.
Learn how to post multiple photos on Instagram with this step-by-step guide. Boost engagement, tell better stories, and connect with your audience.
Instagram has moved beyond single photos. People love swiping through albums. They also enjoy step-by-step guides. Behind-the-scenes shots are popular too. These posts add more context and tell a story. That is why carousel posts have become a big trend. Carousels entertain your followers. They also help you reach more people. Studies show that users spend more time on carousels. One photo is quick to view. Ten photos keep people swiping. More time means stronger engagement. More engagement means your post can reach a wider audience. If you want to share your story in a deeper way, carousels are perfect.
Here’s a simple guide on how to post multiple photos on Instagram.
Why posting multiple images is so important
Before we dive into the steps, let’s talk about why this feature is important.
- Storytelling: A single photo doesn’t always capture the whole story or picture. Multiple images allow you to show the start, the middle, and the end of a story.
Trendy & engaging: Carousel posts are trendy. They’re also among the most shared on Instagram. Since people swipe, they stick around longer, which helps with visibility.
Excellent for creators & brands: Travel bloggers can show different views of a city. Chefs can post recipes step by step. Small businesses can display their products. Carousels let you share more in one post.
Step 1: Open Instagram and create a new post
- Open the Instagram app.
- Tap the ”+” button at the bottom center (or the top of the right side of the Instagram feed) to add a new post.
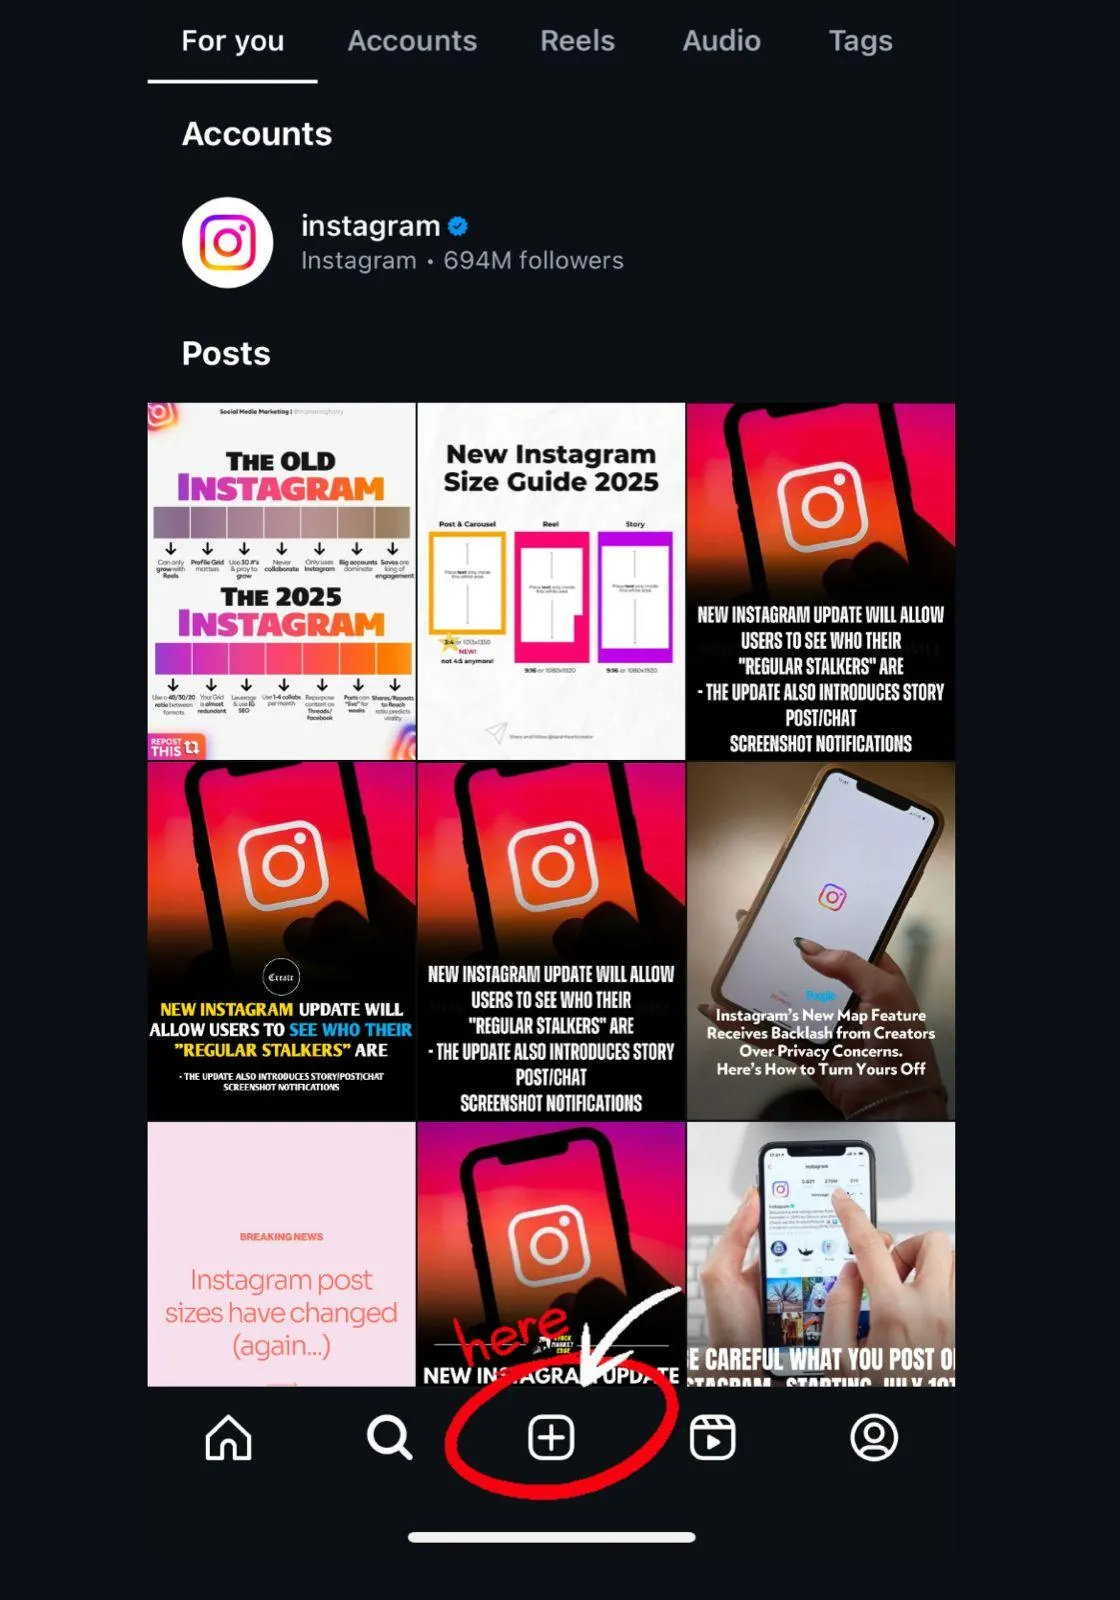
- Select Post from the menu.
This is your beginning page when you upload a content post, whether it is a single photo, video, or carousel.
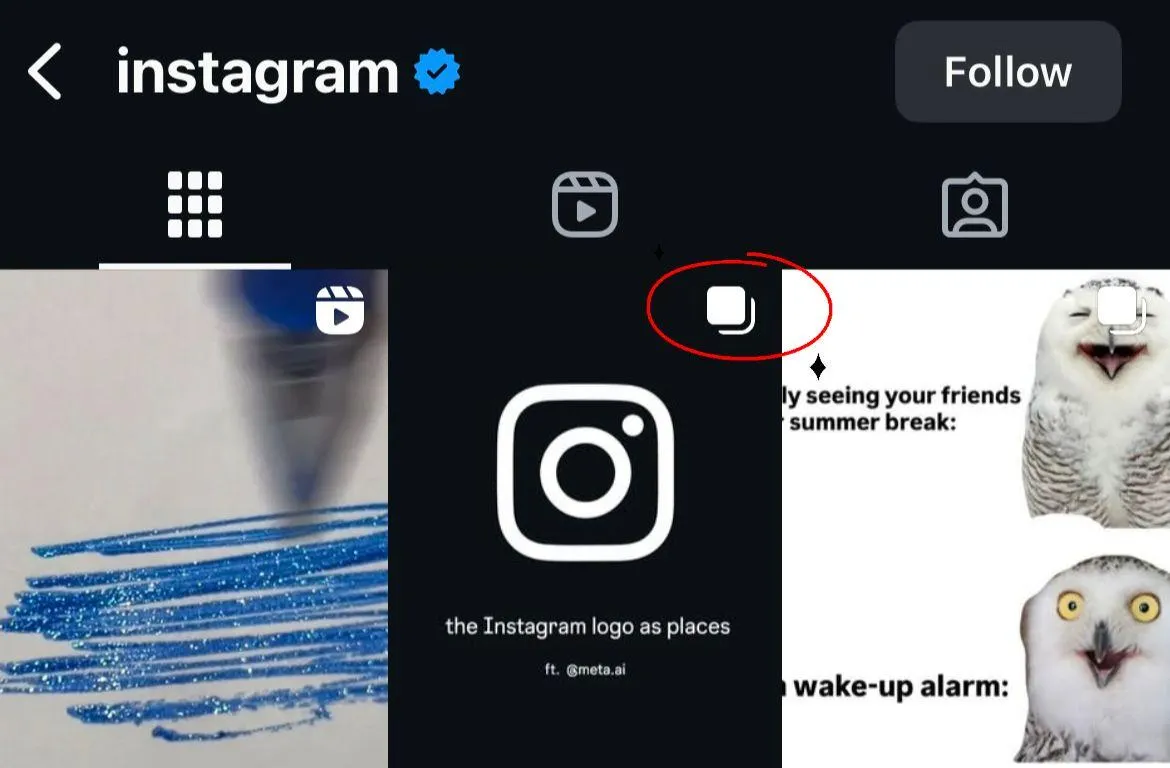
Step 2: Select photos
- Tap the gallery (photo icon) to see your camera roll.
- Find the “Select Multiple” button (two squares overlaid on each other) and tap it.
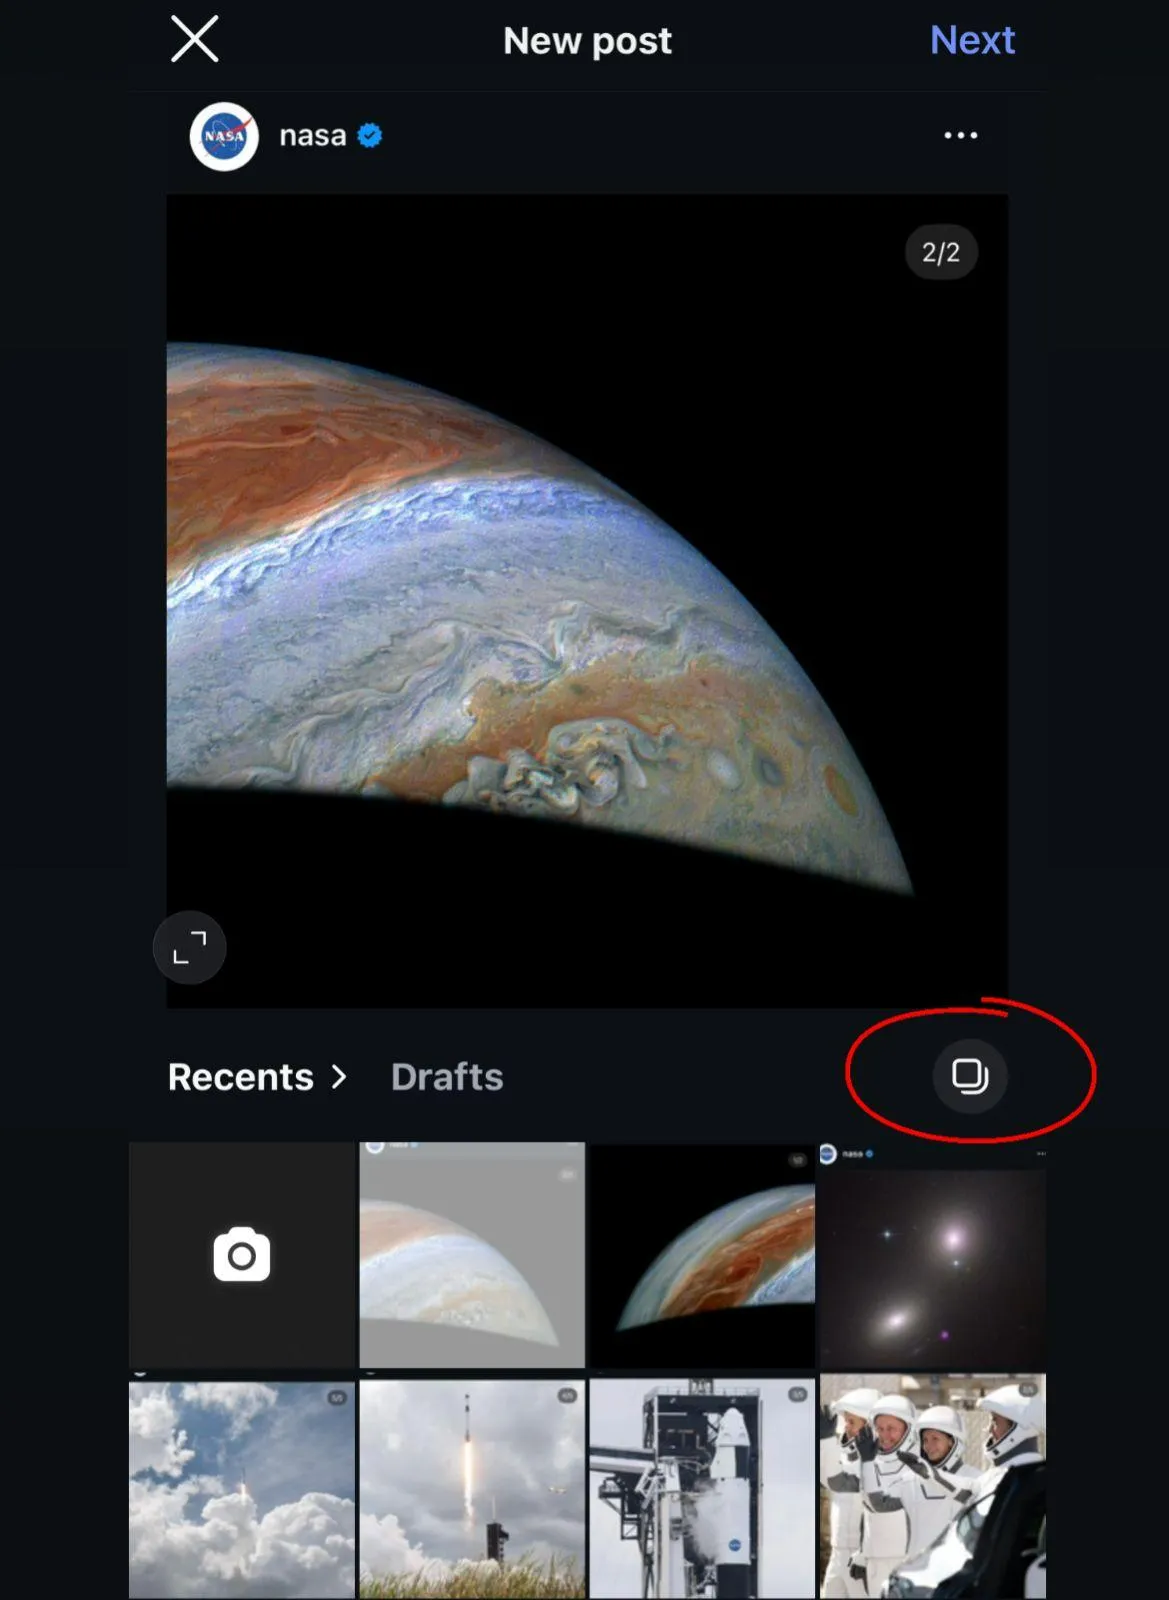
- Choose a maximum of 20 photos or videos.
Pro Tip: Consider how you want to make your selections like a mini-album. Order your selections to tell the best story or order them to maintain people swiping until the last one.
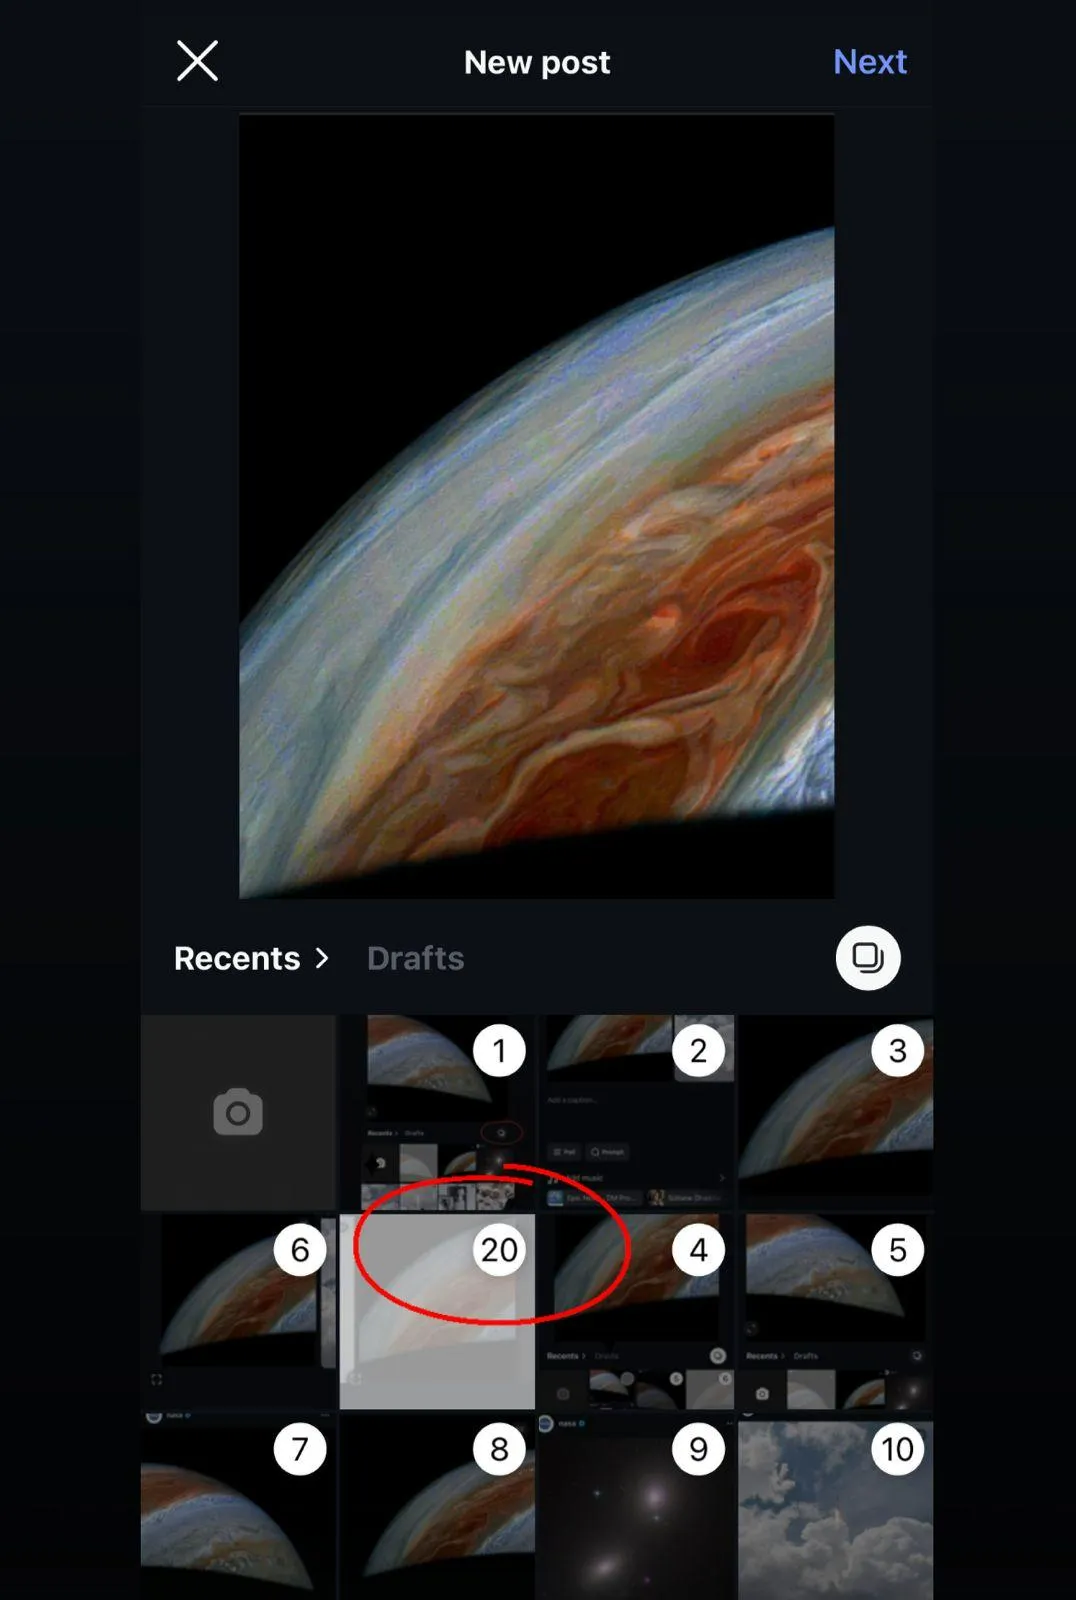
Step 3: Organize the order
- After deciding on your photos, you can drag and drop folders to organize the order.
- The first photo is significant because it is the “cover” that will show on your profile grid.
Try to make your first picture one that is going to stand out. Think of it as the headline of your post, it will convince people to swipe.
Step 4: Edit and apply filters
This is the fun part. On Instagram you can:
- Edit each image individually (brightness, contrast, cropping).
- Choose your filter one by one, or use the same filter across all your photo for a uniform look.

If you want a uniform appearance for your theme, stick to the same style. If you want some variety, give each photo its own vibe.
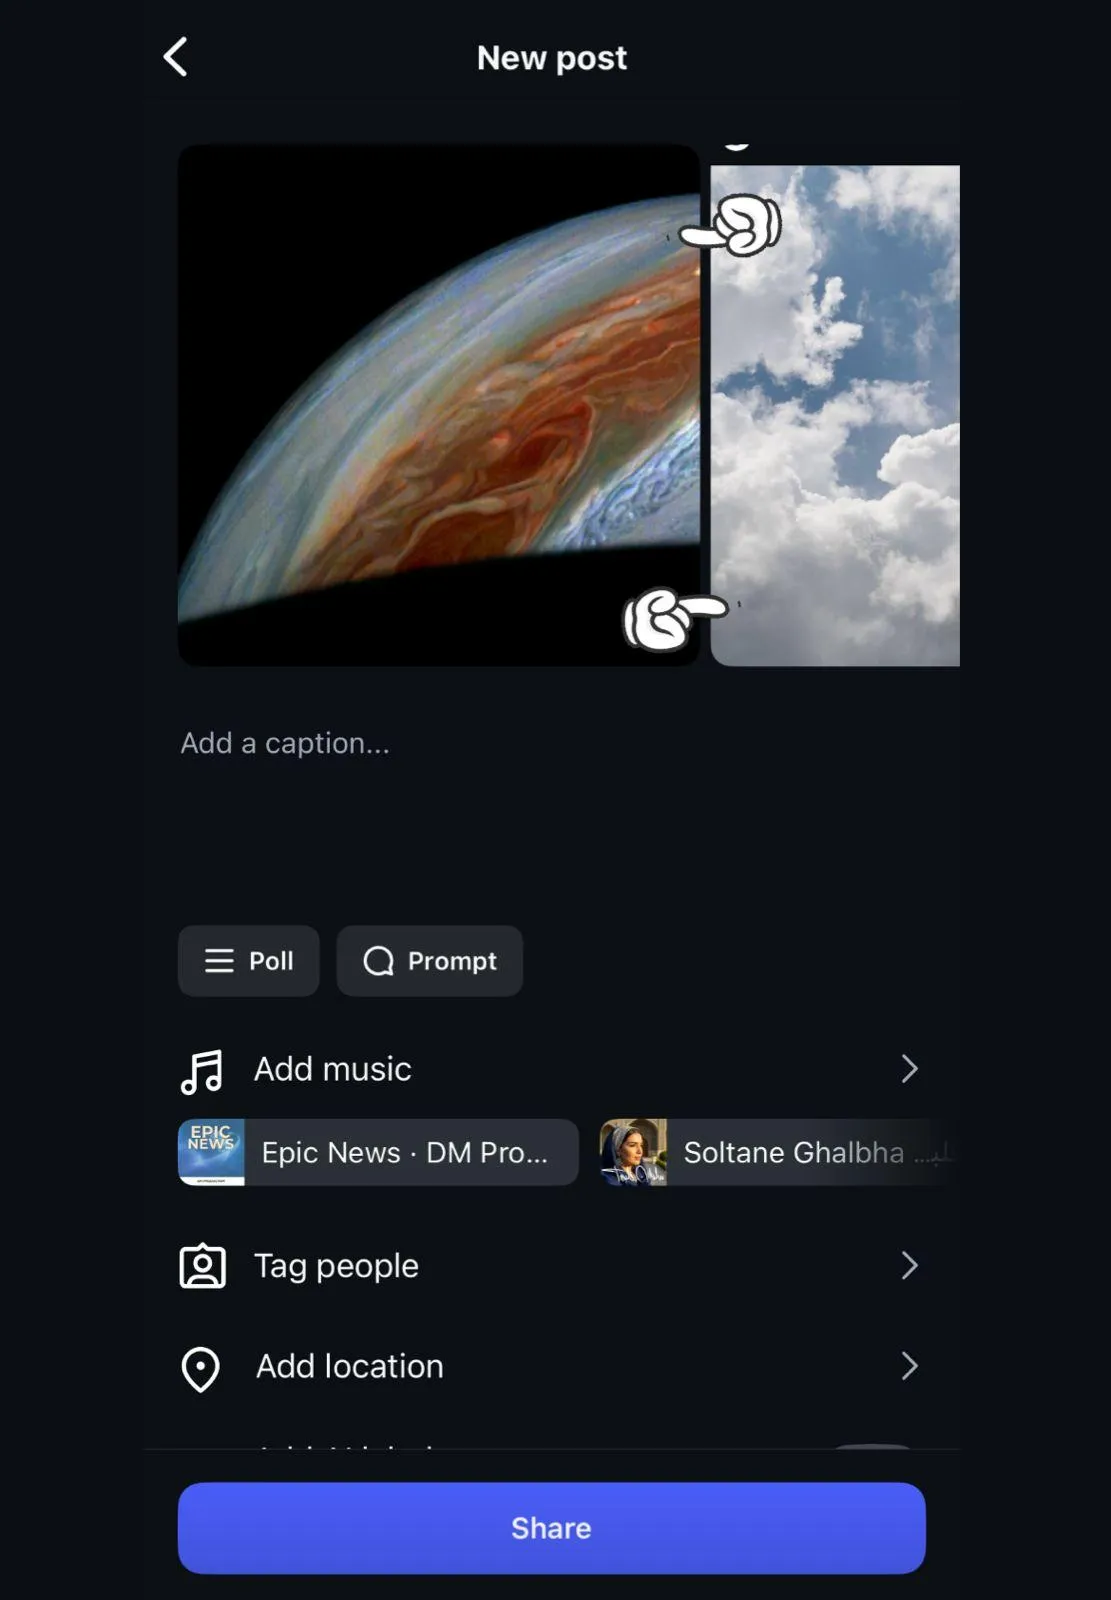
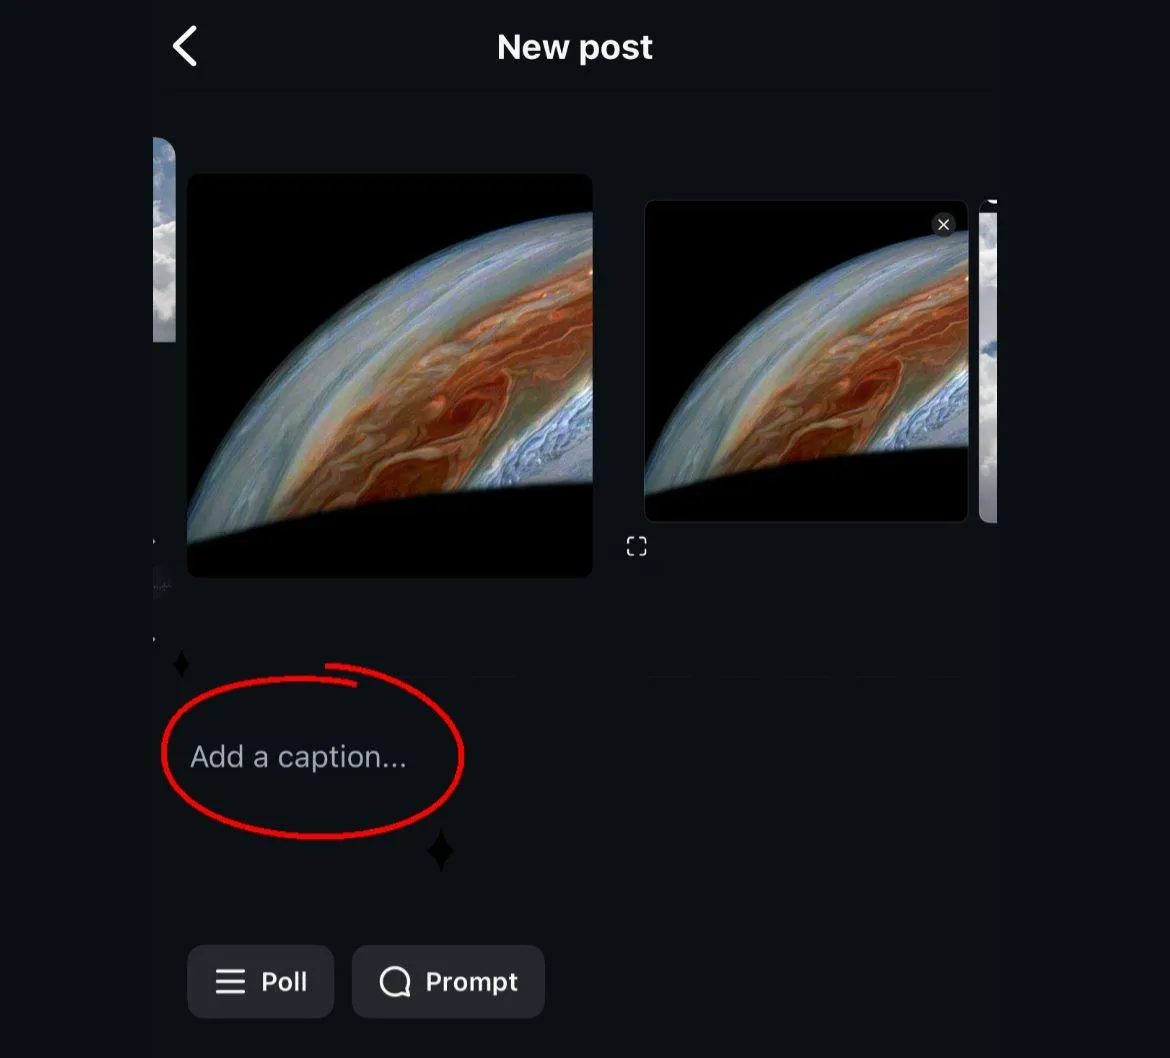
Step 5: Write the captions and hashtags
Now that your photos are ready, it’s time to write your caption.
- You can describe each photo (“Swipe to see more!” works great).
- Share a short story that connects all the photos together.
- Use related hashtags to get in front of more people.
Captions are your opportunity to engage. You could ask your followers a question: “Which one is your favorite photo?” which would encourage more comment engagement; which would increase your post.
Step 6: Tag people and a location
- Tag friends or accounts in your photos
- Add a location so your post can be found by people in the area or who are searching for posts by city.
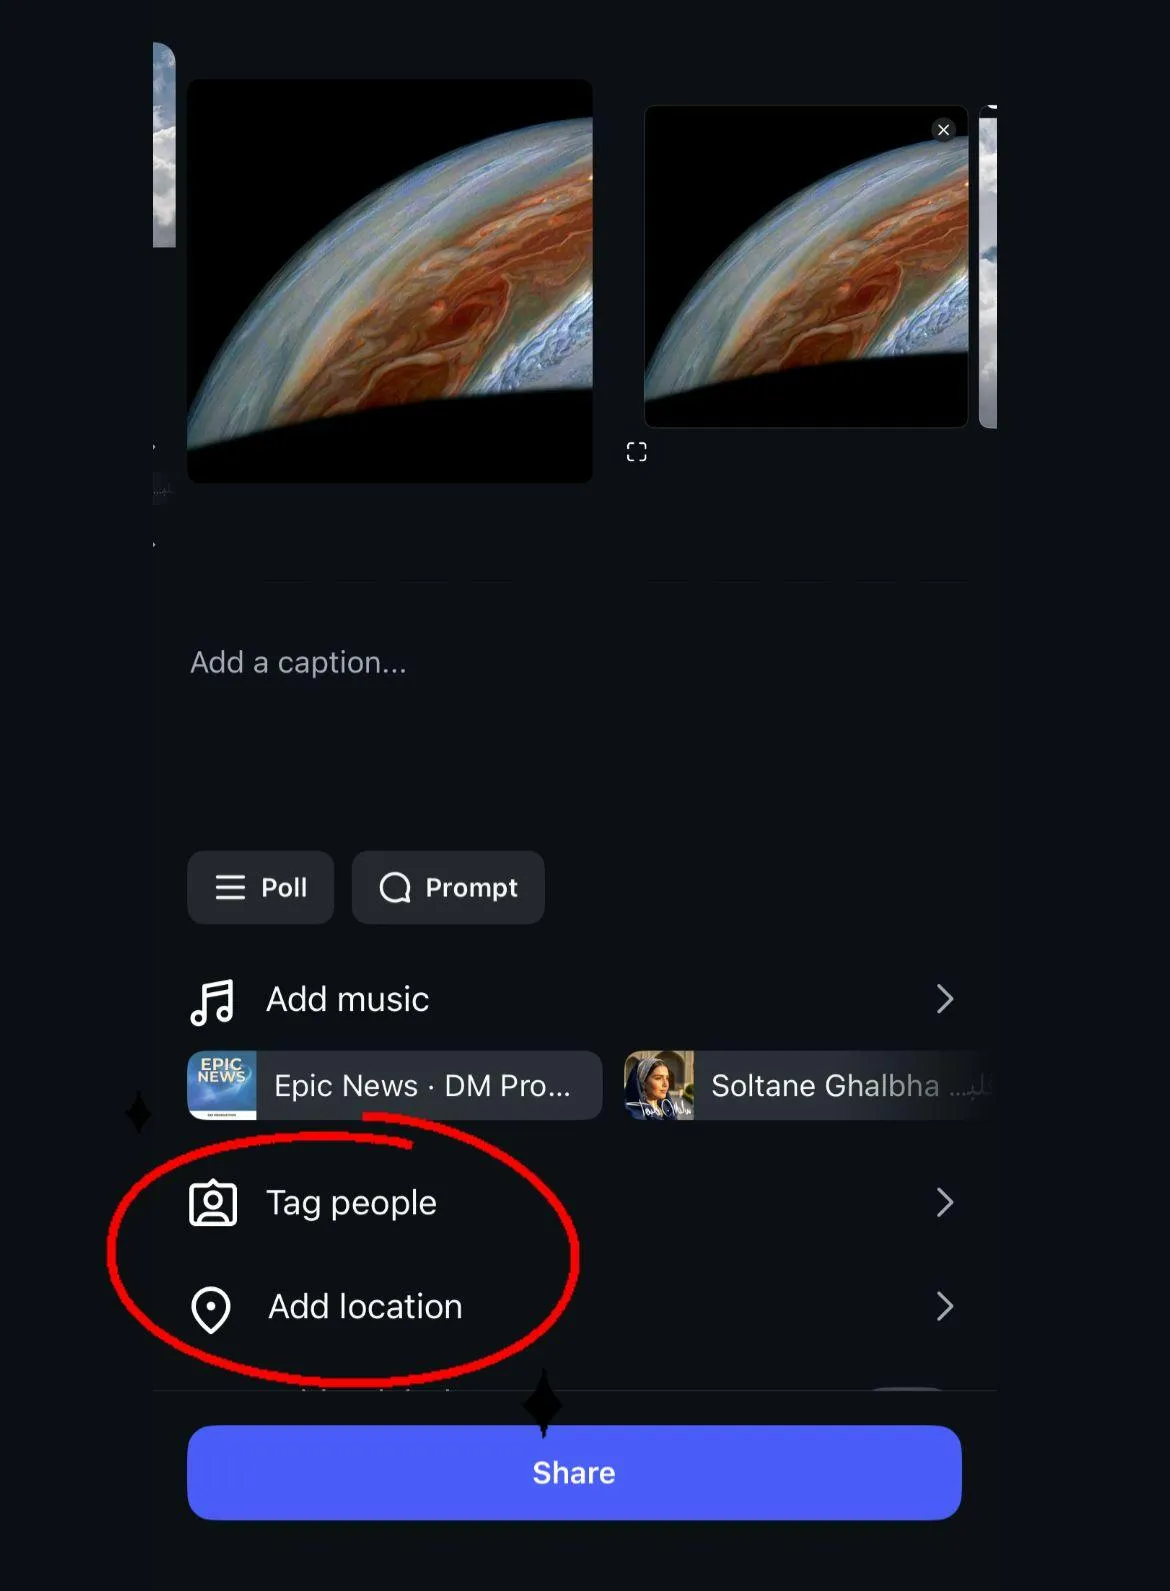
Tagging people is not only fun but it helps widen your post to more people.
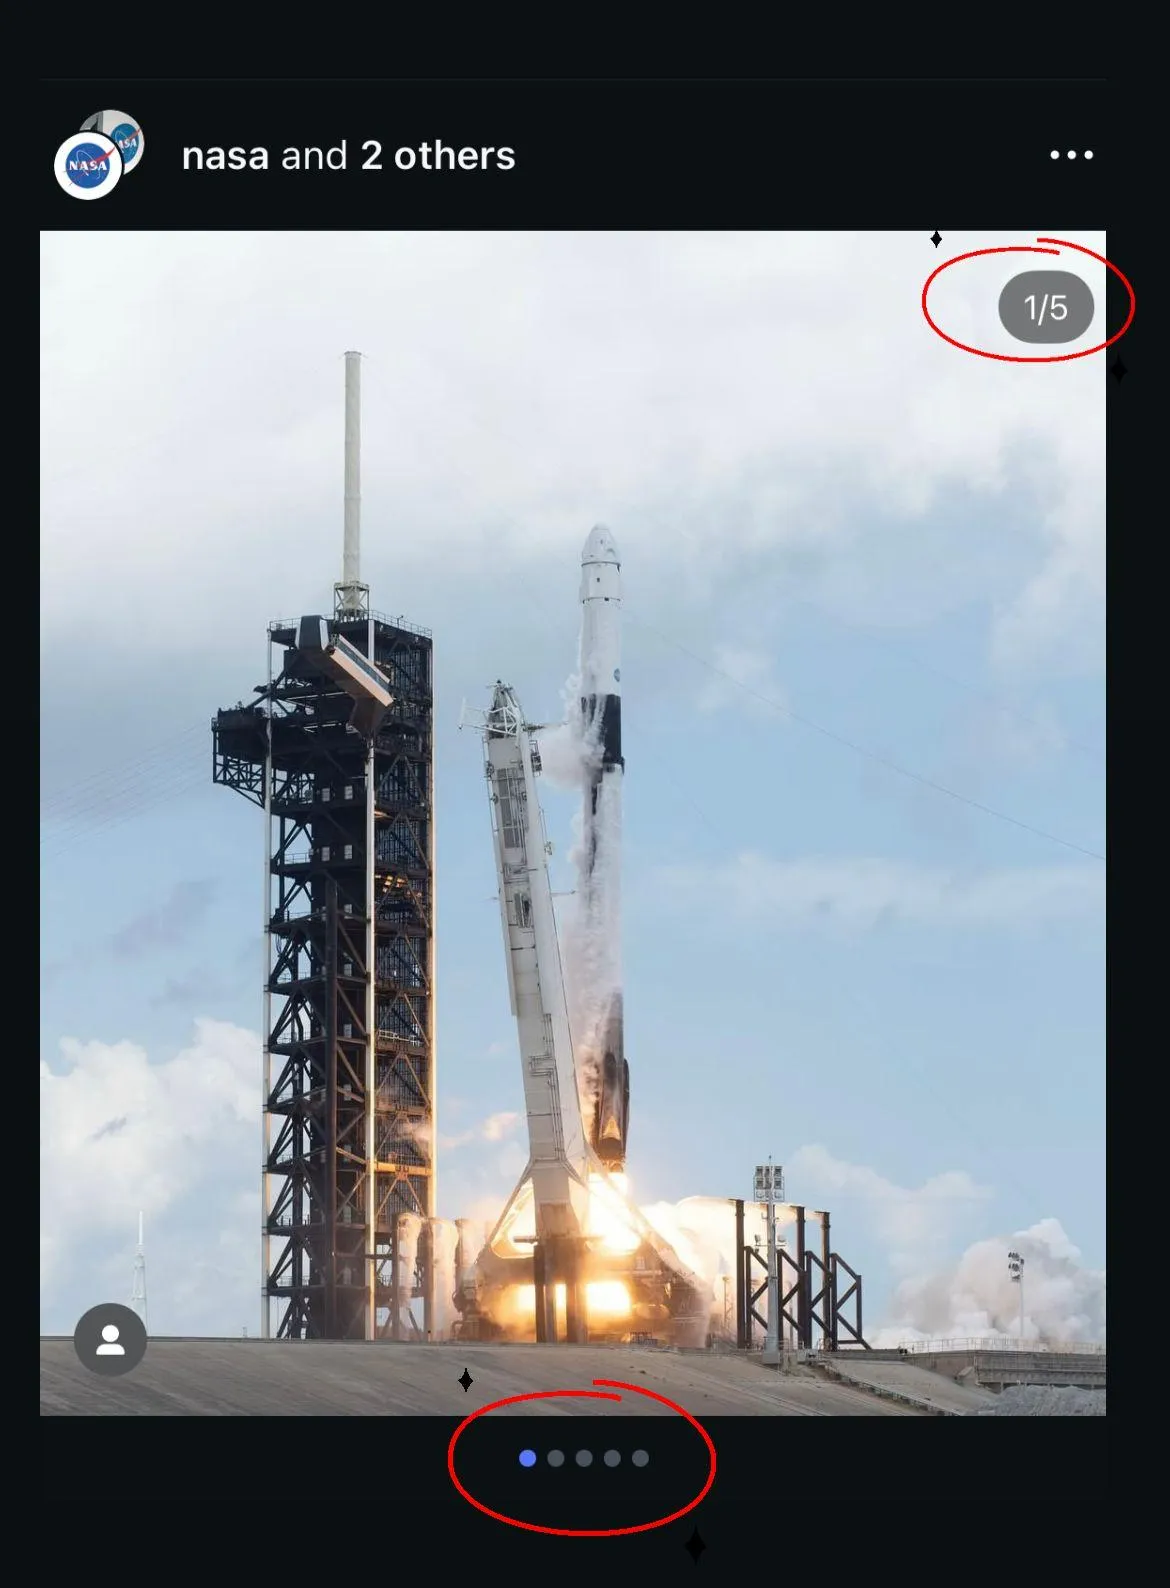
Step 7: Share your carousel
When you are done, hit Share. Your carousel will appear as one post. Small dots at the bottom show followers they can swipe for more.
Additional suggestions for smart carousels
1. Choose both photos and videos
Don’t just use still photos! For extra interest, drop in a 3–4 second video. Combine it with photos. The result is a more lively post.
2. Build a story
Think of your carousel like a mini-book. Start with a strong first photo, create the interest in the middle, and finish with a memorable ending.
3. Use carousel for tutorials
Carousels are also great for how-to’s. For example:
- Step 1, photo of the ingredients
- Step 2, photo of the mixing
- Step 3, photo of finished dish
4. Create Before and After Posts
Everyone loves transformations! Share a ‘before’ picture and the audience gets to swipe to see the ‘after’.
5. Create Opportunities for Interaction
You can use calls to action. For example: “Swipe left to see the surprise.” Or “Comment your favorite photo.”
Mistakes to avoid
While carousels are not complex, there are some mistakes that can tank the power of your carousel:
- Too much of the same: If all 8 photos are almost the same, people will disengage. Go for variety.
- Poor quality photos make people swipe away. Blurry shots, or ones that are too dark or too bright, don’t hold attention. You want your photos to be bright and clear.
- No story or flow: Slapping together pictures with no thought can feel sloppy. Consider the order and whether or not you have a relatable connection.
- Overloading on text: Don’t flood your carousel with text-heavy graphics. Keep it visual and light.
- Don’t skip engagement: Ask followers to comment, swipe, or share. That’s how you build a sense of community.
Why carousels help you grow
Carousels are not just a popular form of content but they are also effective.
- Instagram’s algorithm will favor posts that keep people engaged longer.
- When people swipe through 5-10 photos, they stay longer on your post. That extra time means more focus on your content.
- Posts that create engagement (comment, saves, shares) are also more likely to show up on a swipe of the Explore page.
Many influencers and brands now use carousels instead of single photos. The results are better. More saves, more shares, more visibility.
So…
Posting many photos isn’t only about sharing your life. It also helps you connect with your audience on a deeper level. Carousels are fun, personal, and one of the best ways to grow your account today.
So when you’re ready to share a vacation, upload a recipe, or even just a bunch of selfies, don’t just pick one photo. Use a carousel, tell your story, and see how much your audience engages with you!