· Editor · Tutorials · 7 min read
How to create Highlights on Instagram
Follow these simple steps to create Highlights on Instagram. If you want your story to last, save it as a Highlight, group it by theme, and make it easy for your audience to find.
Follow these simple steps to create Highlights on Instagram. If you want your story to last, save it as a Highlight, group it by theme, and make it easy for your audience to find.
How to create Highlights on Instagram
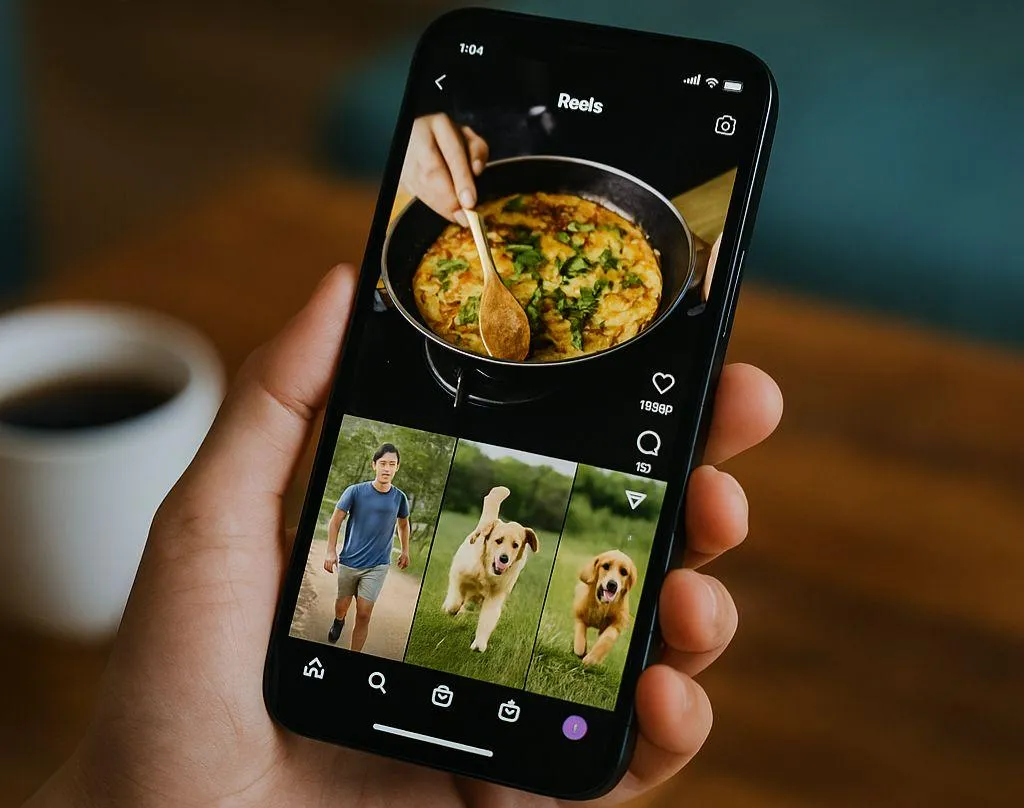
Instagram is not just about photos and short videos. It is a place for connection with others and to tell stories and share memories. One of Instagram’s most fun features is Stories. They’re fun, causal, and fast. The only downside, is they only last a day. This is where highlights come in to play.
You can take your best stories, store them as highlights, and pin them to your profile. they are then displayed for everyone can see, directly under your bio. They are collective collection of your best moments, creative ideas, or brand announcements.
In this guide, we’re going to teach you everything you need to know about Highlights for Instagram.
What are Instagram Highlights?
Instagram Highlights are the collections of stories that you have saved. Unlike a regular story that disappears after 24 hours, a Highlight remains until you take it down. It’s kind of like a folder for your stories. You can manage them by topic, subject, or theme.
For instance:
- A travel blogger may save their trips by city or country
- A small business can create a Highlight for products, reviews, or tutorials
- A personal account may save birthdays or weddings or their daily memories
The purpose of your Highlights is to help visitors feel organized. They also show new followers what matters to you or your brand.

The importance of highlights
Highlights are more than just a beautiful feature. They are functional elements for personal and professional accounts.
1. It keeps stories/do anecdotes alive
Your best, crafted stories will not disappear after 24 hours. They will stay as long as you decide on your own page!
2. Show your personality or your brand
They can see who you are very quickly instead of scrolling through years worth of posts.
3. Easy navigation
Highlights are an easy simplified navigation system for your page or profile. They are kind of like a menu where folks can click and quickly see what sparks their interest.
4. Valuable to marketing (or for personal accounts, informative)
Brands can share FAQs, customer reviews, or short tutorial videos. These are just a few ideas. It saves them time and provides a clear idea of what to expect.
Step 1: Launch Instagram and Go to Your Profile
- Turn on the Instagram app.
- Click on your profile photo in the bottom right corner.
- Now you’ll be in your profile page, where all your posts and bio and your existing Highlights (if any) are.
If you don’t have any Highlights yet, you’ll see an empty space.
Step 2: Access your story archive
Stories are automatically archived by Instagram.
- Click the three lines (the menu) in the top right corner.

- Select Archive.
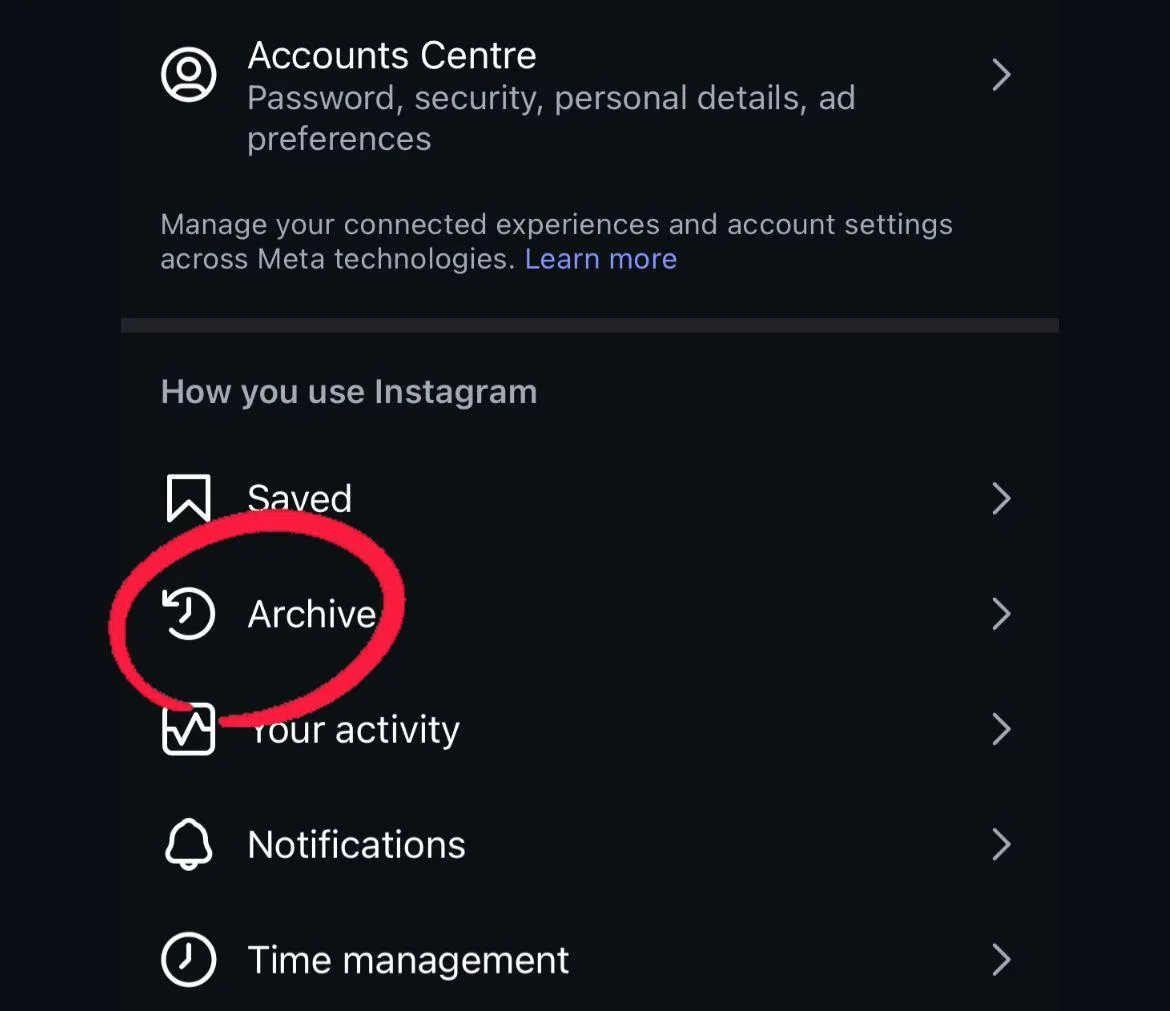
- Now you’ll see every story from your past history, even if it isn’t active at the time.
- This is the location where you would select the stories you wish to add to a Highlight.
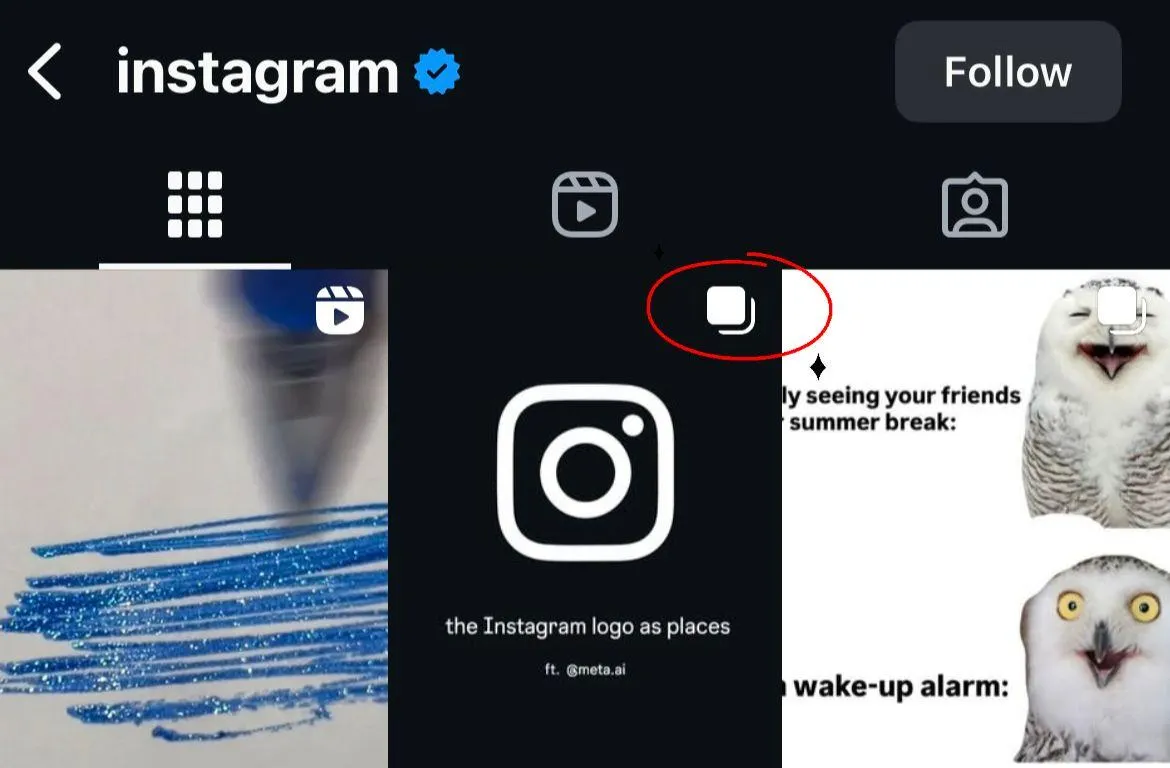
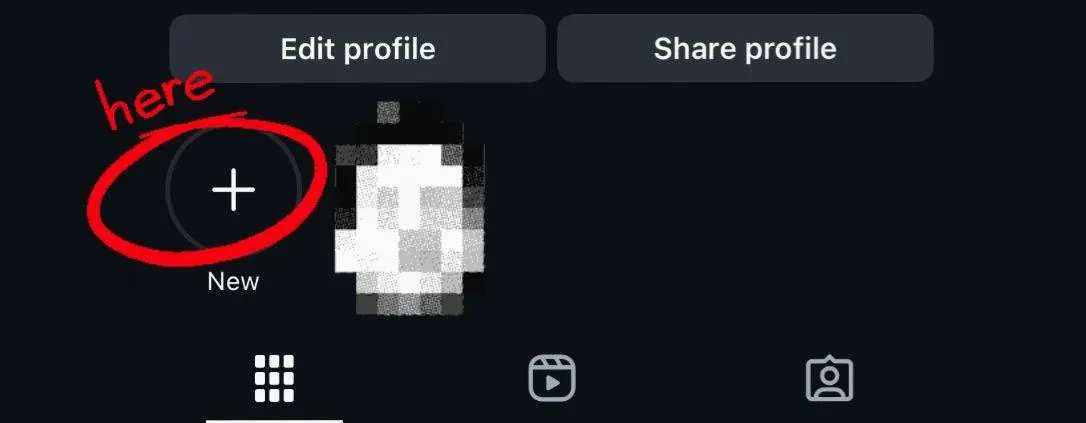
Step 3: Create a new highlight
- In your profile, look for the circle with a “+ New” sign under your bio.
- Tap it.
- A list of all your archived stories will appear.
- Select the ones you want to include.
For example, choose all stories from your last trip to Paris, or all stories about a product launch. After selecting, tap Next.
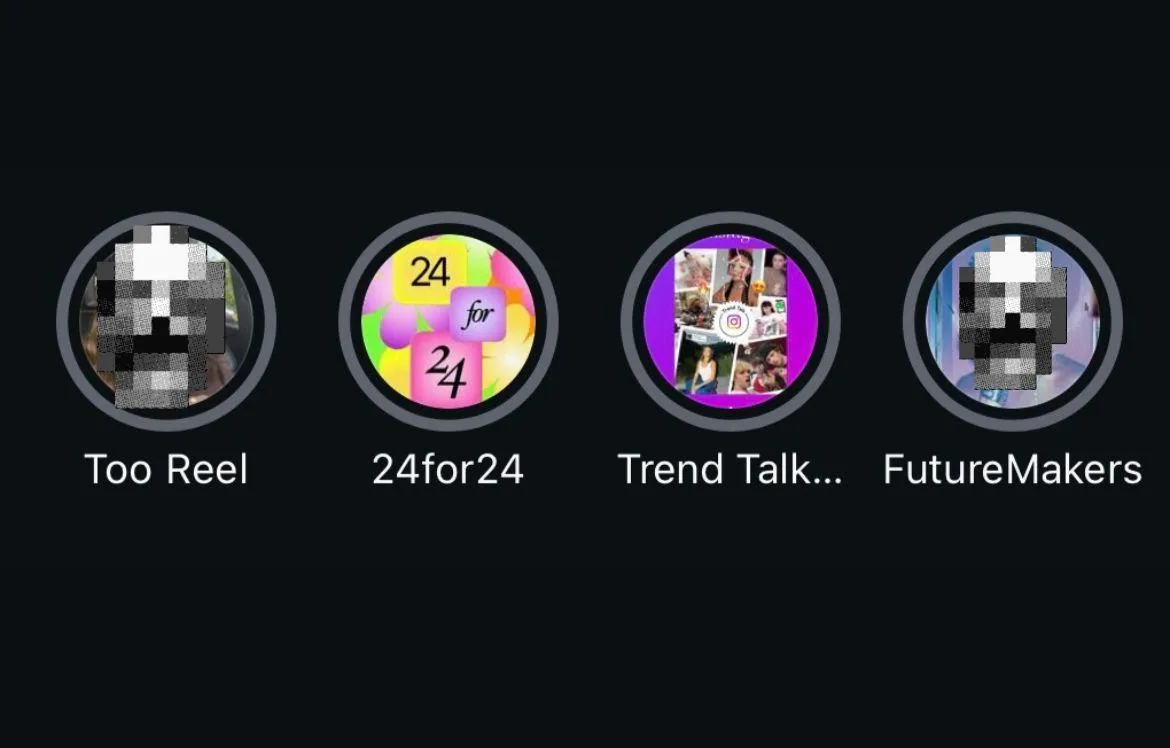
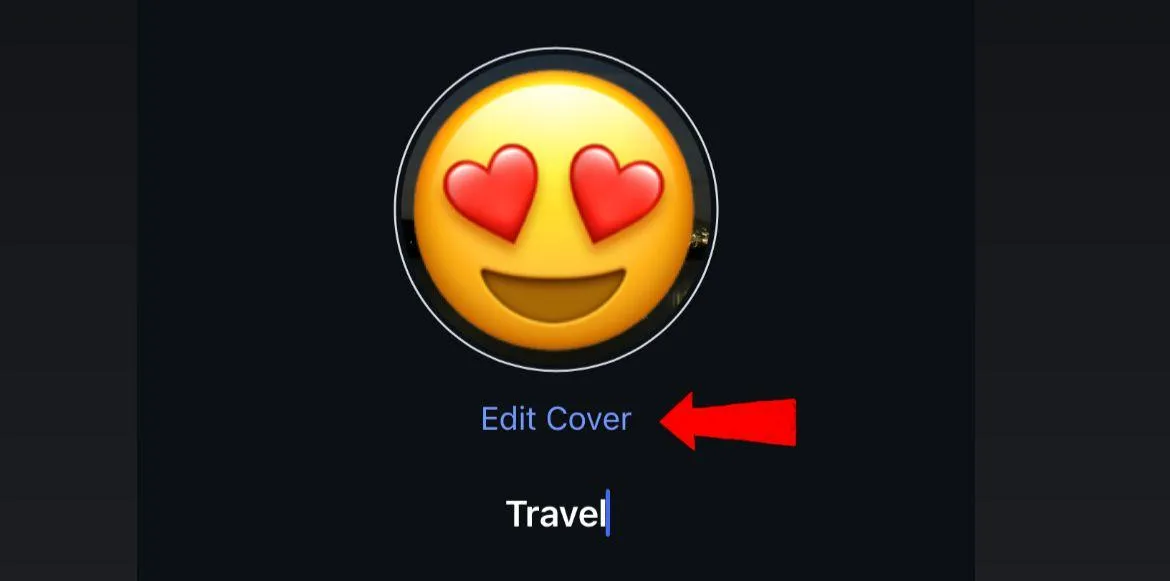
Step 4: Decide on a title
Now you need to select a title for your Highlight. Make it short. People should be able to tell what the Highlight’s about from just the title.
Examples:
- Travel
- Recipes
- Reviews
- Behind the Scenes
- Wedding
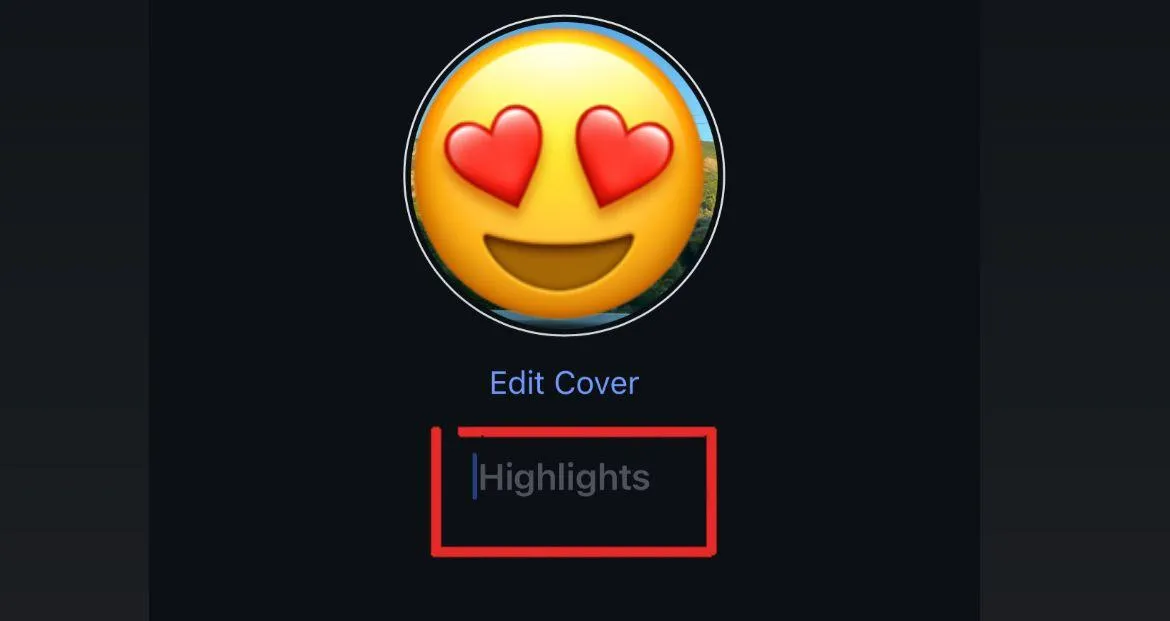
Instagram allows for up to 15 characters, so avoid longer phrases which would be counter to this.
Step 5: Select a cover image.
The cover image is the first thing people see. Usually, Instagram automatically uses one of the images from your story.
But you can change it,
- Press Edit Cover
- Choose another story image.
- Upload a designed graphic.
Many creators use custom graphics or designed covers for their Highlights. It makes the profile look nicer and adds a touch of brand style. You do not have to choose a graphic or design, a natural, authentic image works just fine.
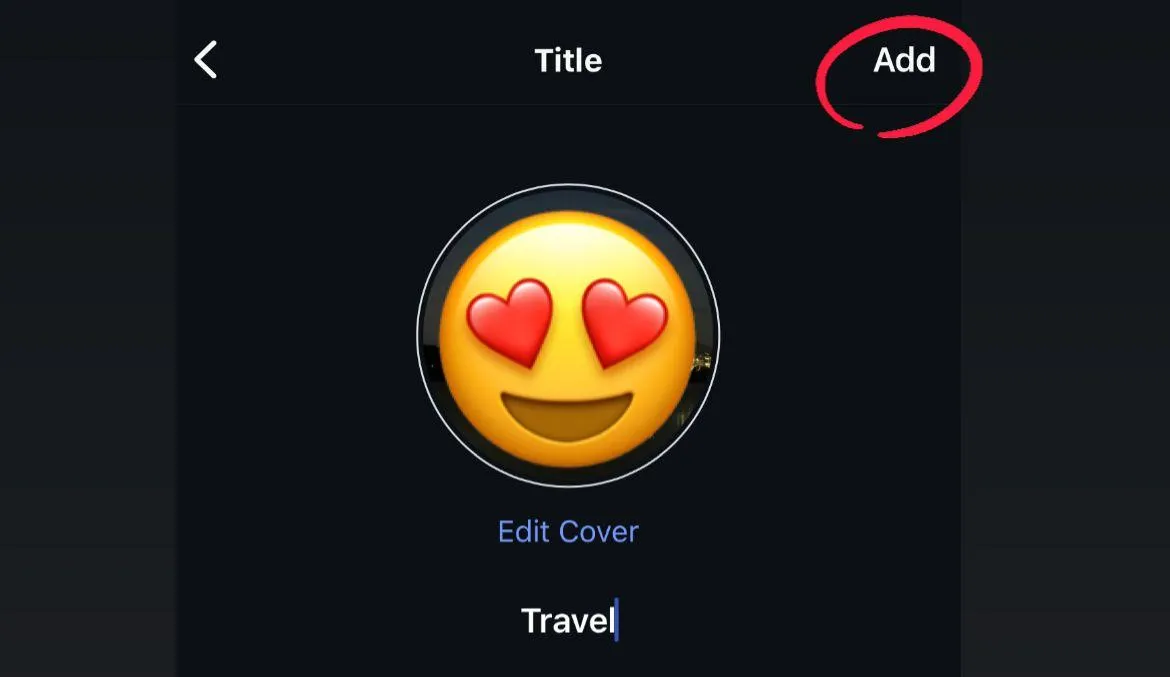
Step 6: Save and share
When you are happy with your selection, name, and cover, click Add. Your Highlight will then appear under your bio. Anyone who goes to your profile will be able to tap on it to view the stories inside.
Step 7: Add more stories later
Highlights are not permanent! You can add more stories to it at any time!
- Press and hold the Highlight you want to edit
- Click Edit Highlight
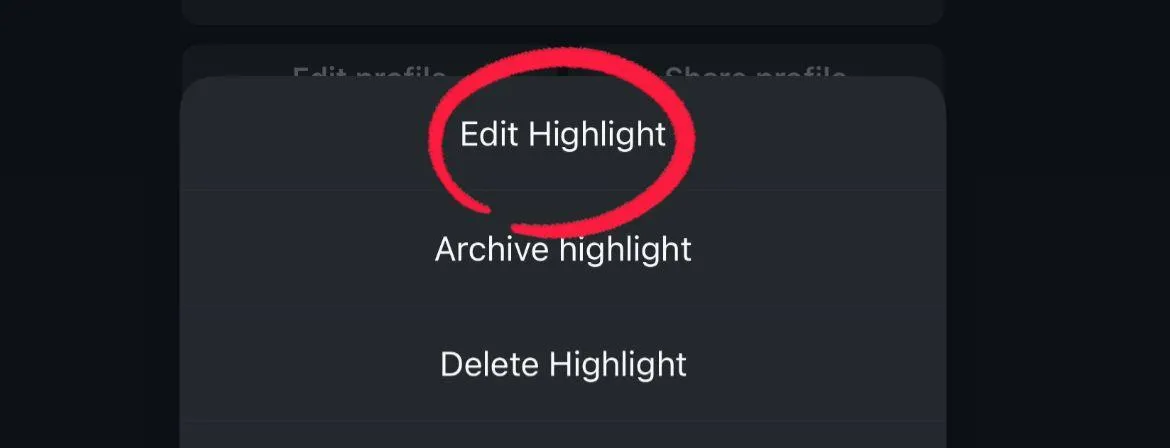
- Select or unselect stories from your archive.
This way you can keep the Highlights updated with new stories.
Extra tips for making good Highlights
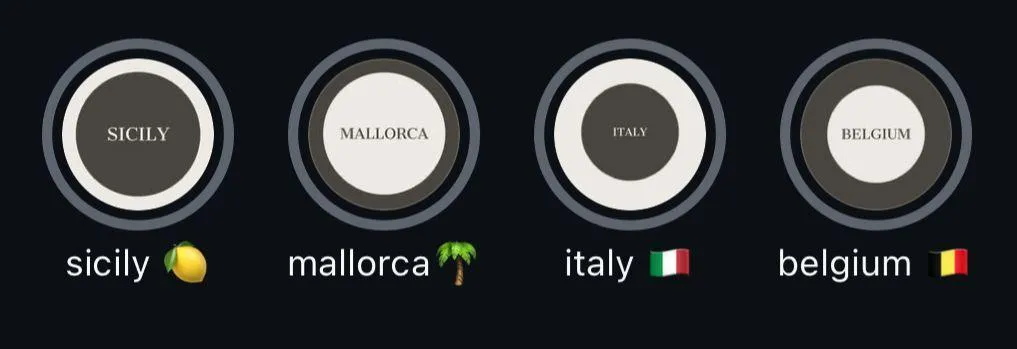
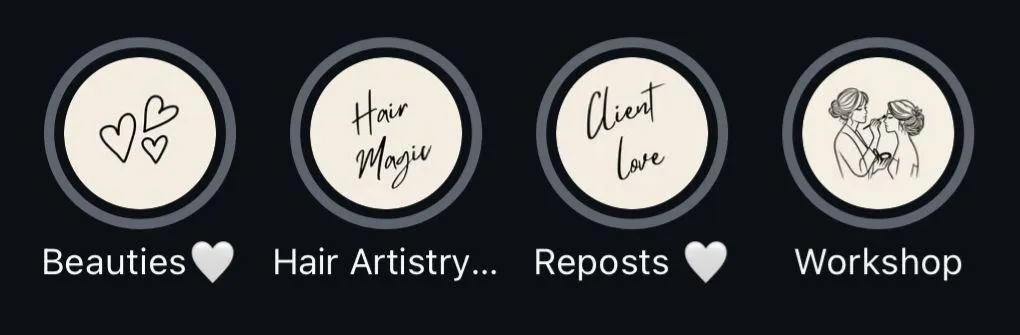
1. Organize by theme
Try not to mix everything in one Highlight. Batch by subject. Example of batch categories: “Food,” “Travel,” “Family,” “Tips.”
2. Keep it short
Don’t make a Highlight with 100+ stories. No one is going to watch all those stories. Select your favorite ones.
3. Use custom covers
You can create covers that are simple, like using an icon or matching colors. It makes your profile look more aesthetic and professional.
4. Add value for your audience
Think about what your audience actually needs. A how-to guide, an FAQ, or a set of top tips is more valuable than random clips.
5. Update often
This is useful after a tour or group trip. You may have many stories, but some of them might not be relevant weeks later. Don’t feel like you have to leave old information on a Highlight and just remove it when it deals with yesterday.
Mistakes to avoid
- Too many random stories. If the Highlight feels messy, people won’t watch.
- Long, boring clips. Keep it engaging.
- Hard-to-read titles. Short and clear works best.
- Ignoring covers. An ugly or random cover can make the Highlight less inviting.
- Never updating. Outdated Highlights make your profile feel inactive.
Creative Ideas for Highlights
Highlights are flexible. Here are ways you can use them:
For Personal Accounts
- Save memories from birthdays, holidays, or trips.
- Create a Highlight of your pets.
- Keep a “Best of” reel with your favorite stories.
For Creators
- Showcase tutorials.
- Save fan shoutouts or collaborations.
- Highlight your creative process, step by step.
For Businesses
- Add a “Shop” Highlight with product demos.
- Use “Reviews” to show customer feedback.
- Share behind-the-scenes content.
- Answer FAQs in story format and save them.

Why Highlights help you grow
Highlights make profiles feel alive. They show effort, creativity, and consistency. When new people visit, they instantly learn about you. They also keep people on your page longer. That extra time means more chance for likes, follows, and even sales.
- For brands, Highlights build trust.
- For personal accounts, they create a sense of personality.
- For creators, they showcase work and attract collaborations.
Advanced tips
- Plan your Highlight strategy. Treat them like mini-portfolios.
- Match colors and fonts. Create a style that reflects your brand.
- Promote them in stories. Post about your new Highlight so people know it exists.
- Track performance. See which Highlights get more views and adjust accordingly.
Highlights are one of Instagram’s most powerful features. They let you save your best stories, organize them, and display them proudly on your profile. They are simple to create, easy to manage, and useful for anyone, from casual users to big brands. Start with one Highlight today. Save a few stories, pick a nice cover, and share it. Over time, you’ll build a collection that shows your personality or business in the best way possible. Highlights are not just memories. They are tools to connect, share, and grow.